Showing posts with label projects. Show all posts

Monday, May 9

A Welcome Wreath

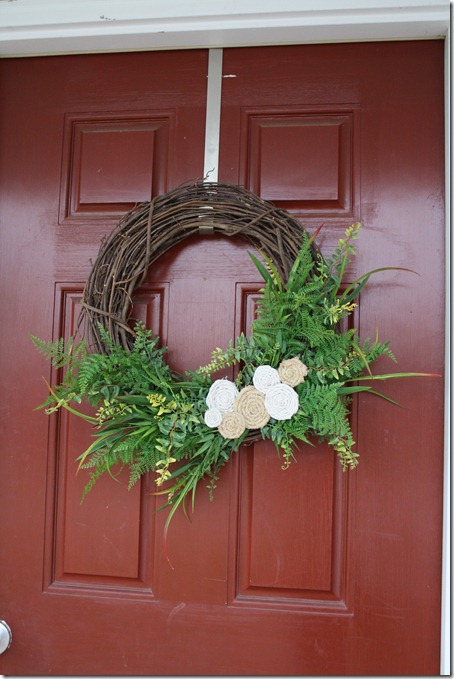
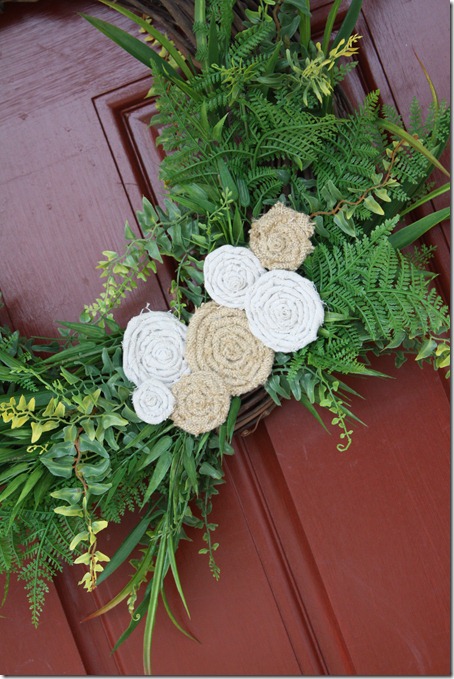
One of the projects I wanted to finish up was a new wreath for the front door. I have never really had anything up for the spring and summer that I have liked or finished. Last year the wreath hung unadorned waiting for me to do something! I finally got around to it this year. Perhaps it was lack of inspiration or motivation, but this year I got it done!2011 05 02_1073 I think it looks quite welcoming for a potential buyer. I only spent about 5.00 on the greenery and rolled the flower rosettes out of leftover fabric. So simple! 2011 05 02_1074
Next up on the list is painting the front door. The first thing people will see is this door and the paint is peeling off!  Here is a photo of when we first moved in. Boys and Buldozers (4)And one of when the door was painted red. The color has faded so much!  Our Front Porch
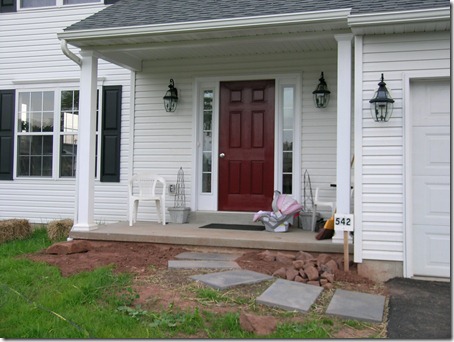
What color would you paint it?

Wednesday, May 4

A New table for the kitchen

2011 05 03_1083 I often look at the Craigslist listings where my parents live to see if there might be anything interesting, after all it's a college town and well, just different than where we are at. I came across this table one evening and asked my Mom to see if it was still available. It was if she could come that day, otherwise it would go to someone else. Off she went to pick it up for 50.00! Of course it needed to be refinished. It is a lovely pine table made by Pennsylvania house that came with two leaves. I don't have a before of it all put together, but you can get the idea of the orange finish it used to have.
2011 05 02_1017
2011 05 02_0965


I I had been in search of a round table for a while, as the one we had before was a little to big for the space. This one is perfect and makes the kitchen look much bigger. That will be nice when we put the house on the market. Originally I was going to paint the chairs, but have decided to wait to see what our new house will look like and what color will look good for the chairs. 2011 05 03_1085
 I painted the pedestal and apron "Swiss Coffee" by Bher and used English chestnut for the glaze. The distressing and glaze really brought out all the beautiful details this table has. I just love it's feet!
2011 05 03_1087
So pretty!
2011 05 03_1088


I decided to stain the top with Ebony, which is a black finish. It really toned down the orange pine can have and gave it a warm brown finish while keeping the some red undertones. I wouldn't recommend this for every piece of pine, but it was perfect for this one. I then put two coats of polyurethane to take it home. I am currently adding 3 more coats to the top for durability. 2011 05 03_1092
We love our "new" table! This is the view from the living room into the kitchen. The little hutch was the first piece of furniture I ever refinished way back when I was in college. I paid 25.00 for it and it matched the old table. 2011 05 03_1082
This is the view into the kitchen and living room from the hallway. Yes, we still use baby gates, they keep our cat in the house because we don't have a screen, and she eats the flies that come in. It works perfectly. :)
2011 05 03_1080 And one more shot because I liked it!2011 05 03_1085

Sharing with this party!

Friday, March 11

Book Page Wreath

2011 03 09_0639When I first saw this wreath Stephanie made over at Under The Table and Dreaming, I knew I wanted, no needed one for my own house. What I didn't realize it that it would take at least 275 rosettes to complete one wreath. After what felt like hours, days, and weeks,  of cutting spirals and rolling flowers at every spare moment I finally finished it. 2011 03 09_0769 I can tell you it was worth all the burned fingers, blisters, and time it took to make. I just love walking past it every day! I hung it in the foyer over my crate thingy. :) I bought it at a yard sale last year and am still trying to figure out what its original purpose was. I don't think I ever shared this piece on here before. 2011 03 09_0636Here is the view from the front door. 2011 03 09_0637 I won't share how I made it as I followed exactly what Stephanie did in her tutorial. So if you want to make one for yourself you can read how to do it here- Under The Table and Dreaming.2011 03 09_0640It was really fun to put together after all the flowers had been rolled. 2011 03 09_0639

Linking up to:
Funky Junk's Saturday Nite Special


UndertheTableandDreaming 

Wednesday, February 2

Winter Warmth

In my kitchen I have two old windows hung on the wall. For Christmas last year I hung gumdrop wreaths and had plans to change them out for each season. Well last year that never happened. Those gumdrop wreaths stayed up for 10 months. Even my son was asking if were were going to take down the Christmas wreaths. They did come down for a few short weeks in the fall and then went right back up for Christmas. At least they stored well there. :)
057 Determined not to keep those wreaths up all year again, I needed to come up with something! I kept seeing images of yarn ball wreaths and thought I could do something similar. It felt cozy and warm to look at those wreaths. But I wanted something a bit different. So I made a bundle of balls instead.2011 01 25_0545 Each ball is a different type of white yarn wrapped around a Styrofoam ball. I simply used a bit of hot glue to tack down the string so it could be hung without unraveling.2011 01 25_0548
2011 01 25_0543


UndertheTableandDreaming

Thursday, September 30

A New Dresser

One of the things on my list for the Master bedroom was a new dresser for me. We originally had two chest of drawers and the look was never right to me. I though a more feminine piece would balance out some of the other pieces in the room. I looked and looked all spring and summer for something that would work. Then when my Mom was here visiting at the beginning of the month I came across this piece at the local thrift store. It was 10.00 and of course is a buffet for a dining room. I felt it was perfect for what I wanted in the bedroom. A little different, a little unexpected, and very feminine. It was rather dated with it's yellowed finish so I painted and glazed it to coordinate with the chest of drawers that was staying in the space. 175  I love how it turned out! It sits at the end of the bed and is one of the first things you see when you enter the space. I have plans for the display on the dresser and a mirror to go above it. I just wanted to share that I got something completely done to the point it can be used. It doesn't always happen. :)068060 I love the curvy details of the top.062I decided to keep the original hardware as it also coordinates well with the other pieces in the room, and finding hardware with a  3 1/2 inch center for a reasonable price can take forever!063Everything fits so nicely inside and I have room for more. I did wonder a bit at first if I would like shelves verses all drawers as is standard in a bedroom piece. It turns out I love the shelves, its so easy to find what I need and keep it all organized. It also makes less noise to open the door and therefore I don't wake my husband when I come to bed.066Now to get the mirror finished.

Sharing with
Furniture Feature Fridays

Funky Junk's Sat Nite Special


Thursday, July 29

Week in review

003
This has been one crazy week! It all started out with 100 ears of corn early Saturday morning. By Monday morning I had frozen 26 pounds of corn, made a batch of ketchup, a batch of BBQ sauce, 2 chocolate zucchini cakes, 10 quarts of beans, and a potato salad for my husband to take to on office luncheon. It all made for one busy weekend. When the garden grows it makes one tired Momma!
018
This week the children are at Vacation Bible School. This has left me with 3 hours of time every morning. So I decided to tackle the never ending project. Remember this hutch?
It is now 3/4 of the way done. I still have the 4 doors and the top do. There just wasn't enough space to work on everything at the same time. But at least there is progress!  I really can't wait to see it all finished, it's been sitting around forever!
016
And just because I could I started another project. :) At least this one was easy. The chalkboard in the school room needed painting due to scratched so  I worked on that also. I also decided to make it magnetic with the magnetic primer they sell. I can't wait to use it with our spelling lessons!
011021
  And here is another project I partially finished. Do you see a trend? This is why I own a shirt that says Queen of unfinished projects! You can see where it is just pinned to the table. I want to get some trim and then attach it properly. At least for now it looks so much better that looking at all the junk that is under the table in my scrapbook room.
024
And just to show you that I do finish some things eventually. This is a plant stand I painted back when David was on a business trip. I decided to put it in the dining room. It adds a nice dimension to the otherwise boring corner. When I get everything put together I'll take some better photos and reveal the whole room.
017 Now I am off for a three day scrapbooking retreat and some rest.
See you on Monday!

Sunday, July 11

Tired of waiting

We have been "remodeling" our laundry room for going on four and a half years now and I am tired of it!  This is what happens when you start to many projects at once, think your are moving, and don't like doing drywall! I have been collecting some lovely things for a long time in anticipation of using them and I got tired of storing them and tripping over them all the time. So even if the room is only halfway done at least I can get a start on the decorating instead of staring at blank walls and temporary light fixtures.
This is what the space looked like in February. We just hooked the machines back up so we could do laundry and left it at that.
This is what it looks like now.
003
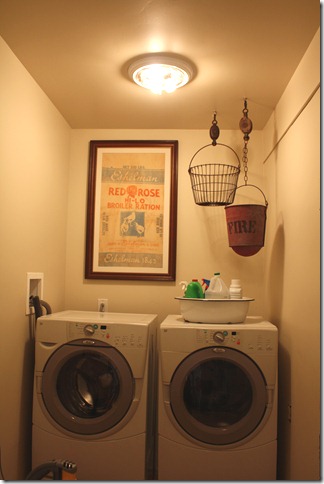
Someday there will be bead board on the walls, a shelf above the washer and dryer and a floor. For now even just adding the baskets and art work the room feels so much better and I don't mind going in there so much to do laundry. 004
The frame is from the goodwill for 3.00 and the feed sack was from a yard sale for the same price. I cut a matte to fit, attached the sack with spray adhesive, and it's held in the frame with painters tape, just in case I change my mind. The egg basket, fire brigade bucket and pulleys are from out local antiques store. I purchased them at various times over the past couple of years. For now the enamelware pan is holding the washing supplies, but I have plans for those once I have a shelf!004
004
Small improvements that really help until we can get to the rest of the room.

Friday, July 2

New life for an old cabinet

Project number two is officially completed. I had it done at the beginning of the week but I needed to get new knobs.  Here is the before picture. 080 This cabinet was a gift from my parents for my 21st birthday. It has been used in many different rooms as storage over the years. I'll leave you to guess how many. :) It is currently my canned goods pantry. I got sick of staring at the yellow pine wood and just knew some paint would give it a new life. What do you think? It's the first thing I see when I walk into the kitchen in the morning. 008 A little distressing to give it the feel of age. The door not shutting all the way anymore helps too. :) 009 The clock was a wedding present from a family friend.  He made it out of quarter sawn ash, knowing my love for the Arts and Crafts movement. I love how it stands out with the painted cabinet now. 010 For those interested the color is called Swiss Coffee by Behr. It works well with the yellow walls. 007Now to move on to another project.
For as soon as I finish one I come up with 100 more...

Linking to
Funky Junk's Saturday Nite Special

Furniture Feature Fridays


LinkWithin

Related Posts with Thumbnails